Discover the Advantages of the Paravento Awning
Enhance Your Outdoor Space with Privacy and Style
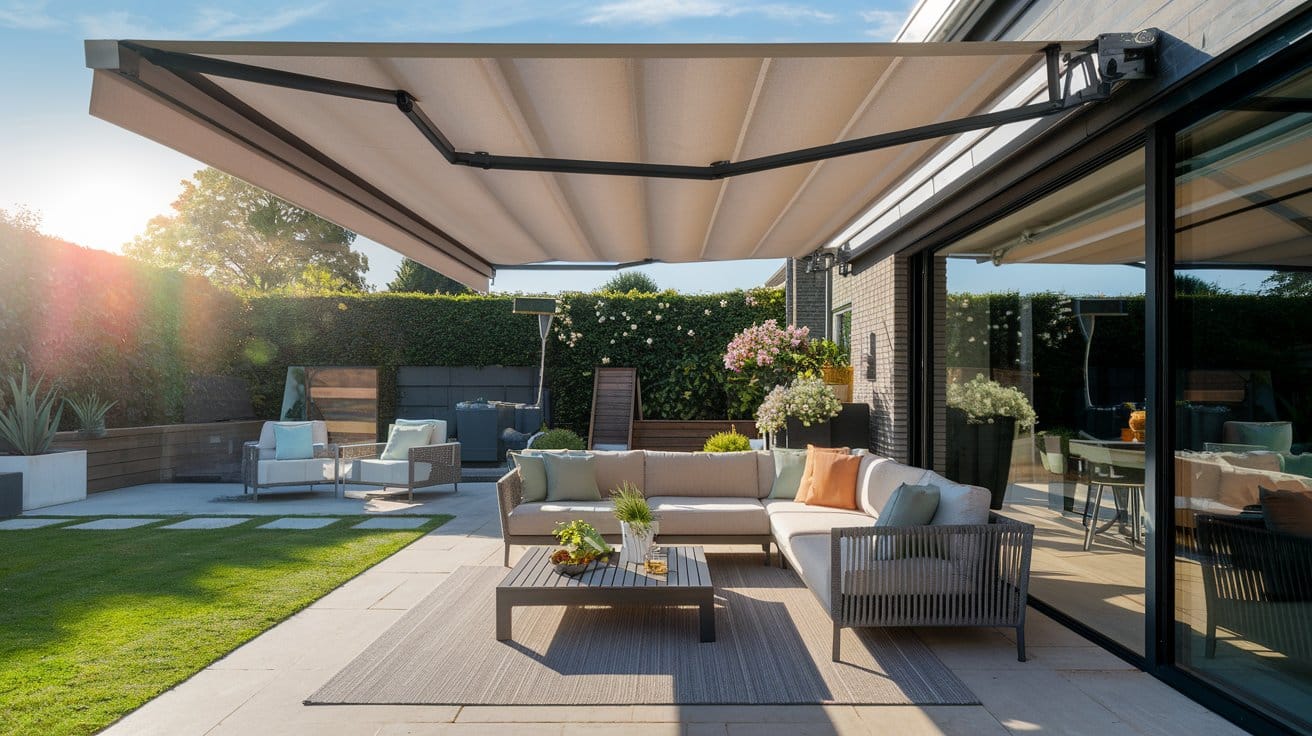
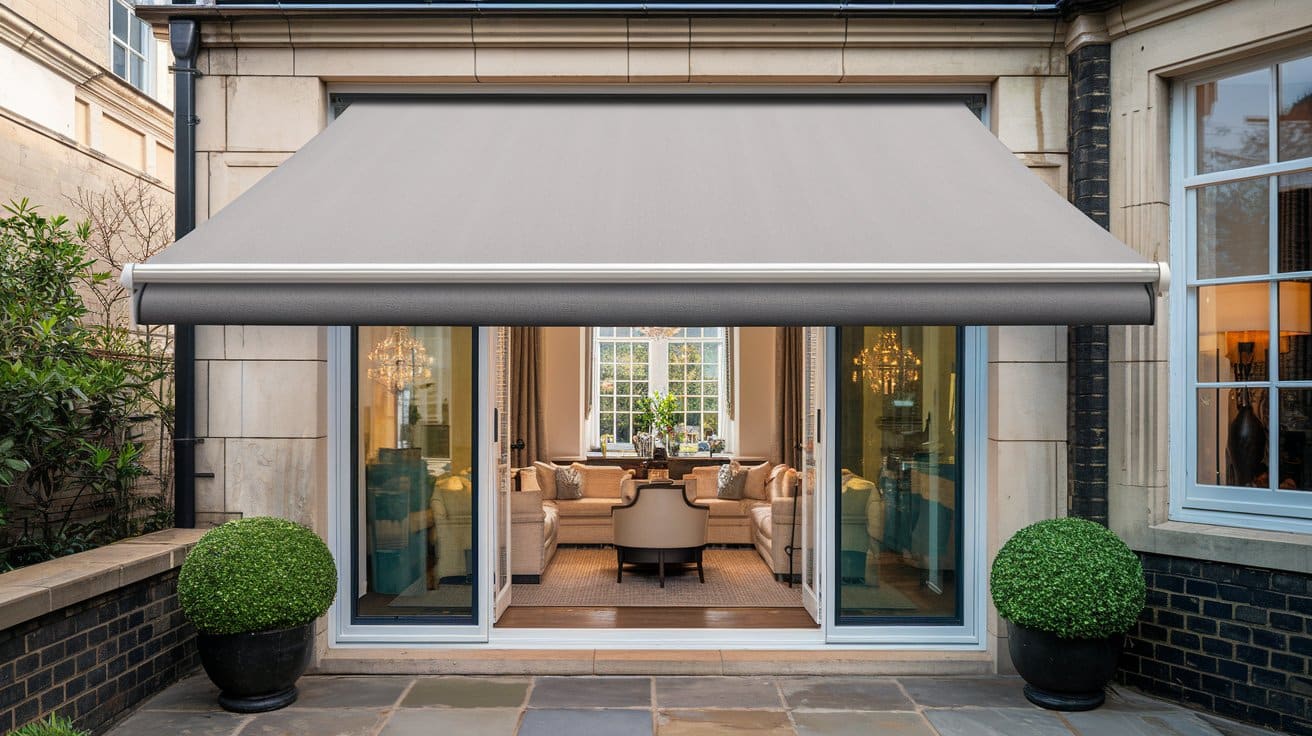
The Paravento awning is a stylish and functional addition to any outdoor space, offering a seamless blend of privacy, shade, and aesthetic appeal. Whether you’re looking to create a secluded retreat on your patio or shield your balcony from prying eyes, this retractable side awning provides an elegant solution.
Key Benefits of the Paravento Awning
- Privacy and Sun Protection – The Paravento awning acts as a discreet barrier, shielding your outdoor space from neighbours while filtering harmful UV rays to reduce glare and heat.
- Durability in All Weather Conditions – Built with high-quality materials, the robust aluminium cassette protects the fabric when retracted, ensuring longevity and resistance to wind and rain.
- Effortless Installation and Maintenance – Designed for convenience, the awning is easy to instal and operate, with a smooth retractable mechanism that adapts to changing weather conditions. Minimal upkeep ensures long-lasting performance.
- Aesthetic Appeal and Customization – Available in a range of fabric patterns and frame colours, the Paravento awning enhances the visual appeal of any outdoor setting, complementing your existing décor.
Why Choose the Paravento Awning?
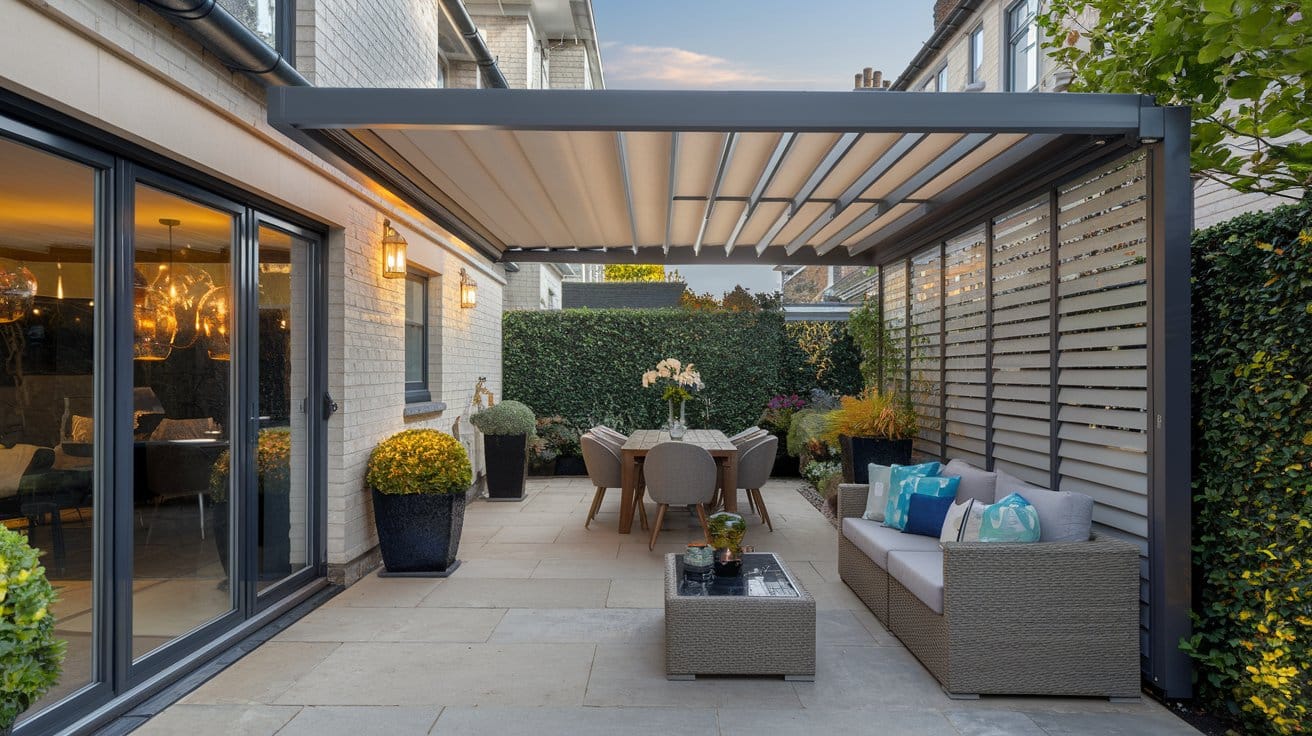
Homeowners favour the Paravento awning for its combination of practicality and elegance. Unlike traditional fixed screens, this retractable solution offers flexibility, allowing you to adjust coverage as needed. Its sleek design integrates seamlessly into modern and classic outdoor spaces, adding value to your property while enhancing comfort.
By integrating privacy, durability, and style, the Paravento awning stands out as a versatile and valuable addition to any outdoor area.
What Tools and Materials Are Essential for Installation?
Ensuring a Smooth and Secure Installation
Installing a Paravento awning requires precision and the right set of tools to ensure stability, durability, and ease of operation. Using the correct materials not only simplifies the process but also enhances the awning’s longevity and performance.
Essential Tools for Installation
To achieve a secure and professional installation, the following tools are necessary:
- Drill and Drill Bits – Essential for creating precise mounting holes in walls or posts.
- Measuring Tape and Level – Ensures accurate positioning and alignment to prevent uneven installation.
- Screwdriver or Power Driver – Used to fasten screws securely into place.
- Adjustable Wrench and Socket Set – Required for tightening bolts and securing brackets.
- Stud Finder – Helps locate solid mounting points in walls for added stability.
- Marker or Chalk Line – Useful for marking drill points and ensuring straight alignment.
Materials Required for a Secure Fit
- Mounting Brackets and Screws – Designed to hold the awning securely in place.
- Anchors or Wall Plugs – Provide additional support when mounting on masonry or drywall.
- Weather-Resistant Sealant – Protects mounting points from moisture and enhances durability.
- Protective Gloves and Safety Goggles – Ensures safety while handling tools and materials.
Why Using the Right Tools Matters
Using improper tools or low-quality materials can compromise the awning’s stability, leading to misalignment, weak fastening, or structural failure over time. Ensuring compatibility with the Paravento awning’s specifications is crucial for a seamless and long-lasting installation.
While some tools may have alternatives, substituting key components like mounting brackets or fasteners with non-compatible options can affect the awning’s performance and safety. Proper preparation and the right equipment make the installation process efficient and reliable.
How Do I Prepare the Site for Installation?
Creating a Stable Foundation for Your Paravento Awning
Proper site preparation is essential for ensuring the stability, longevity, and optimal performance of your Paravento awning. A well-prepared installation site minimises potential issues, enhances durability, and ensures seamless functionality.
Clearing the Area and Ensuring a Level Surface
Before installation begins, the designated area should be free of obstructions such as furniture, plants, or debris. A clear workspace allows for precise measurements and proper alignment. Additionally, the surface where the awning will be mounted must be level and structurally sound. Uneven or weak surfaces can compromise the awning’s stability, leading to misalignment or premature wear.
Key Factors to Consider When Selecting the Installation Location
- Sun Exposure: Positioning the awning to maximise shade during peak sunlight hours enhances comfort and energy efficiency.
- Wind Direction: Installing the awning in a location shielded from strong winds reduces strain on the structure and extends its lifespan.
- Accessibility: Ensure there is sufficient space for operation and maintenance, allowing easy access for adjustments or repairs.
The Impact of Site Preparation on Performance and Longevity
A poorly prepared site can lead to installation challenges, such as improper alignment or inadequate support. Over time, this may result in fabric sagging, frame instability, or increased wear due to environmental exposure. By carefully selecting and preparing the installation site, you can enhance the awning’s resilience against weather conditions and ensure a secure, long-lasting fit.
Taking the time to prepare the site correctly lays the foundation for a successful installation, maximising both functionality and aesthetic appeal.
FAQ’s
What Are the Steps for Installing the Paravento Awning?
A Step-by-Step Guide for a Secure and Efficient Installation
Installing a Paravento awning requires precision and careful execution to ensure stability and longevity. Follow this structured guide to achieve a seamless installation.
Step 1: Prepare the Installation Site
- Clear the area of any obstacles, such as furniture or plants, to create a safe and accessible workspace.
- Ensure the mounting surface is level, sturdy, and capable of supporting the awning’s weight.
- Consider environmental factors like sun exposure and wind direction to optimise placement.
Step 2: Gather the Necessary Tools and Materials
- Use a drill, measuring tape, level, and screwdriver for accurate installation.
- Secure mounting brackets, screws, and anchors that match the surface type.
- Wear protective gloves and safety goggles to ensure safe handling of tools.
Step 3: Instal the Mounting Brackets
- Mark the drill points using a level to maintain proper alignment.
- Drill pilot holes and insert anchors if mounting on masonry or drywall.
- Secure the brackets firmly with screws, ensuring they can support the awning’s weight.
Step 4: Attach the Awning Cassette
- Carefully position the Paravento awning’s cassette onto the brackets.
- Fasten the cassette securely, ensuring it is level and stable.
- Verify that the cassette is aligned correctly to facilitate smooth extension and retraction.
Step 5: Secure and Tension the Fabric
- Extend the fabric and attach it to the opposite mounting post or wall bracket.
- Adjust the tensioning system to keep the fabric taut and evenly distributed.
- Confirm that the locking mechanism functions properly to prevent unwanted movement.
Step 6: Final Stability and Safety Check
- Test the awning by extending and retracting it multiple times to ensure smooth operation.
- Tighten any loose screws and verify that all components are securely fastened.
- For installations in high-wind areas, reinforce the structure with additional supports if necessary.
By following these steps, you can ensure a secure and efficient installation, allowing you to enjoy the benefits of your Paravento awning with confidence.
How Do I Ensure I Have the Right Tools for Installation?
Selecting the Proper Equipment for a Seamless Setup
Installing a Paravento awning requires precision, stability, and the right tools to ensure a secure and efficient process. Using the correct equipment not only simplifies installation but also enhances the awning’s durability and performance.
Essential Tools for a Secure Installation
To achieve a professional and stable installation, the following tools are indispensable:
- Power Drill with Assorted Bits – Ensures precise hole placement for mounting brackets.
- Measuring Tape and Spirit Level – Guarantees accurate alignment and prevents uneven installation.
- Screwdriver or Cordless Driver – Facilitates secure fastening of screws and bolts.
- Adjustable Wrench and Socket Set – Provides firm tightening of structural components.
- Stud Finder – Identifies solid mounting points in walls for enhanced stability.
- Marking Pencil or Chalk Line – Aids in precise positioning before drilling.
Materials to Ensure a Secure Fit
- Heavy-Duty Mounting Brackets and Screws – Designed to anchor the awning securely.
- Wall Anchors or Expansion Bolts – Provide additional reinforcement on masonry or drywall.
- Weatherproof Sealant – Protects mounting points from moisture and environmental wear.
- Protective Gloves and Safety Goggles – Essential for safe handling of tools and materials.
Why the Right Tools Matter
Using improper tools or low-quality materials can compromise the awning’s stability, leading to misalignment, weak fastening, or structural failure over time. Ensuring compatibility with the Paravento awning’s specifications is crucial for a seamless and long-lasting installation.
While some tools may have alternatives, substituting key components like mounting brackets or fasteners with non-compatible options can affect the awning’s performance and safety. Proper preparation and the right equipment make the installation process efficient and reliable.
What Maintenance Is Required for the Paravento Awning?
Keeping Your Awning in Prime Condition
Regular maintenance is essential to preserve the functionality, appearance, and longevity of your Paravento awning. By incorporating simple upkeep routines, you can prevent premature wear and ensure smooth operation for years to come.
Cleaning and Fabric Care
Over time, dust, pollen, and environmental debris can accumulate on the fabric, affecting its durability and aesthetic appeal. To maintain its condition:
– Gently brush off loose dirt and debris to prevent buildup.
– Use a mild soap solution with lukewarm water to clean the fabric, avoiding abrasive cleaners that may compromise its protective coating.
– Ensure the awning is completely dry before retracting to prevent mould or mildew formation.
Structural and Mechanical Inspection
Performing routine checks helps identify minor issues before they escalate. At least twice a year, or after extreme weather conditions, inspect the following:
Fabric Integrity: Look for signs of fraying, sagging, or discoloration that may indicate wear.
Frame and Fasteners: Check for loose screws or bolts and tighten them as needed to maintain structural stability.
Retractable Mechanism: Apply a silicone-based lubricant to moving parts to ensure smooth operation and prevent stiffness.
When to Seek Professional Assistance
While basic maintenance can be handled independently, professional servicing may be required for:
– Significant fabric wear or damage requiring replacement.
– Issues with the retractable mechanism that affect functionality.
– Structural adjustments or reinforcements in high-wind areas.
By following these maintenance practices, your Paravento awning will continue to provide reliable shade, privacy, and aesthetic appeal for years to come.
How Do I Troubleshoot Common Awning Issues?
Identifying and Resolving Common Problems
The Paravento awning is designed for durability and ease of use, but occasional issues may arise due to weather exposure, mechanical wear, or improper installation. Addressing these concerns promptly ensures continued functionality and extends the awning’s lifespan.
Fabric Sagging and Tension Loss
Over time, the fabric may lose its tautness, leading to sagging or uneven coverage. This can result from prolonged exposure to wind and rain or gradual loosening of the tensioning system. To restore proper tension:
– Inspect the tensioning mechanism and adjust it according to the manufacturer’s recommendations.
– Verify that the fabric is evenly secured at both ends to maintain uniform distribution.
– If sagging persists, check for worn-out components that may require replacement.
Frame Misalignment and Operational Resistance
A misaligned frame can hinder smooth extension and retraction, often caused by improper installation or external pressure from strong winds. To correct this:
– Examine the mounting brackets to ensure they are firmly secured and properly aligned.
– Use a level to check for any tilting and make necessary adjustments.
– Tighten any loose screws or bolts that may be affecting stability.
Hardware Loosening and Mechanical Stiffness
Regular use and environmental factors can cause screws and fasteners to loosen over time, potentially leading to operational difficulties. To prevent further complications:
– Periodically inspect all fastenings and tighten them as needed.
– Apply a silicone-based lubricant to moving parts to ensure smooth operation.
– If the awning becomes difficult to retract, check for obstructions or debris buildup in the mechanism.
Preventative Maintenance for Long-Term Performance
Routine inspections help mitigate potential issues before they escalate. Checking the awning’s condition at least twice a year, particularly after extreme weather, allows for early detection of wear and tear. If significant damage or persistent issues arise, professional servicing may be necessary to restore optimal functionality.
How Does The Outdoor Living Group Ensure Expert Installation?
Precision, Expertise, and Tailored Solutions
At The Outdoor Living Group, we specialise in the professional installation of Weinor awnings, ensuring a seamless and stress-free experience for homeowners and property owners. With over 20 years of expertise in outdoor living solutions, our team delivers precision-engineered installations that enhance the functionality, durability, and aesthetic appeal of your Paravento awning.
Comprehensive Installation Services
Our installation process begins with a detailed site assessment to determine the best positioning for your awning. We take into account factors such as sun exposure, wind direction, and structural compatibility to ensure optimal performance. Our certified technicians handle every aspect of the installation, from secure mounting to final adjustments, guaranteeing a flawless fit.
Maintenance and Repair for Long-Term Performance
Beyond installation, we offer ongoing maintenance and repair services to keep your awning in peak condition. Regular inspections help identify potential issues before they escalate, while professional cleaning and component replacements extend the lifespan of your awning.
Tailored Solutions for Every Space
We understand that every property is unique, which is why we provide customised solutions to meet your specific needs. Whether you require a bespoke frame colour, integrated LED lighting, or additional wind protection, our team ensures your awning complements your outdoor space perfectly.
By choosing The Outdoor Living Group, you gain peace of mind knowing your Paravento awning is expertly installed and maintained for long-term performance, allowing you to enjoy a stylish and functional outdoor space with confidence.
What Should I Consider Before DIY Installation?
Assessing Your DIY Readiness
Installing a Paravento awning yourself can be a fulfilling project, but it requires precision, the right tools, and a clear understanding of the process. Before beginning, evaluate your experience with DIY projects. If you are comfortable using power tools, measuring accurately, and following detailed instructions, you may be well-suited for the task. However, if structural modifications or electrical integrations are needed, professional assistance may be advisable.
Essential Tools and Materials
To ensure a smooth installation, you will need:
- Power Drill and Drill Bits – For creating precise mounting holes.
- Measuring Tape and Level – To ensure accurate positioning and alignment.
- Screwdriver or Power Driver – For securing screws and fasteners.
- Anchors and Mounting Brackets – To provide stability and support.
- Protective Gear – Safety goggles and gloves to prevent injuries.
Using high-quality fasteners and anchors ensures stability, while protective gear enhances safety during installation.
Following the Installation Guide
The installation guide provides step-by-step instructions to ensure proper alignment, secure mounting, and fabric tensioning. Skipping steps or misaligning components can lead to operational issues, such as difficulty retracting the awning or reduced wind resistance. Carefully following the guide helps prevent costly mistakes and ensures long-term durability.
When to Consider Professional Help
If you encounter challenges such as uneven mounting surfaces, complex structural requirements, or uncertainty about load-bearing capacity, seeking professional installation may be the best option. Experts ensure precise alignment, secure fastening, and optimal performance, preventing potential issues down the line.
By carefully evaluating your skills, gathering the right tools, and following the guide meticulously, you can determine whether DIY installation is a feasible option for your Paravento awning.