Discover the Benefits and Installation of Roof-Mounted Awnings
Enhance Your Outdoor Space with Expert Installation Guidance
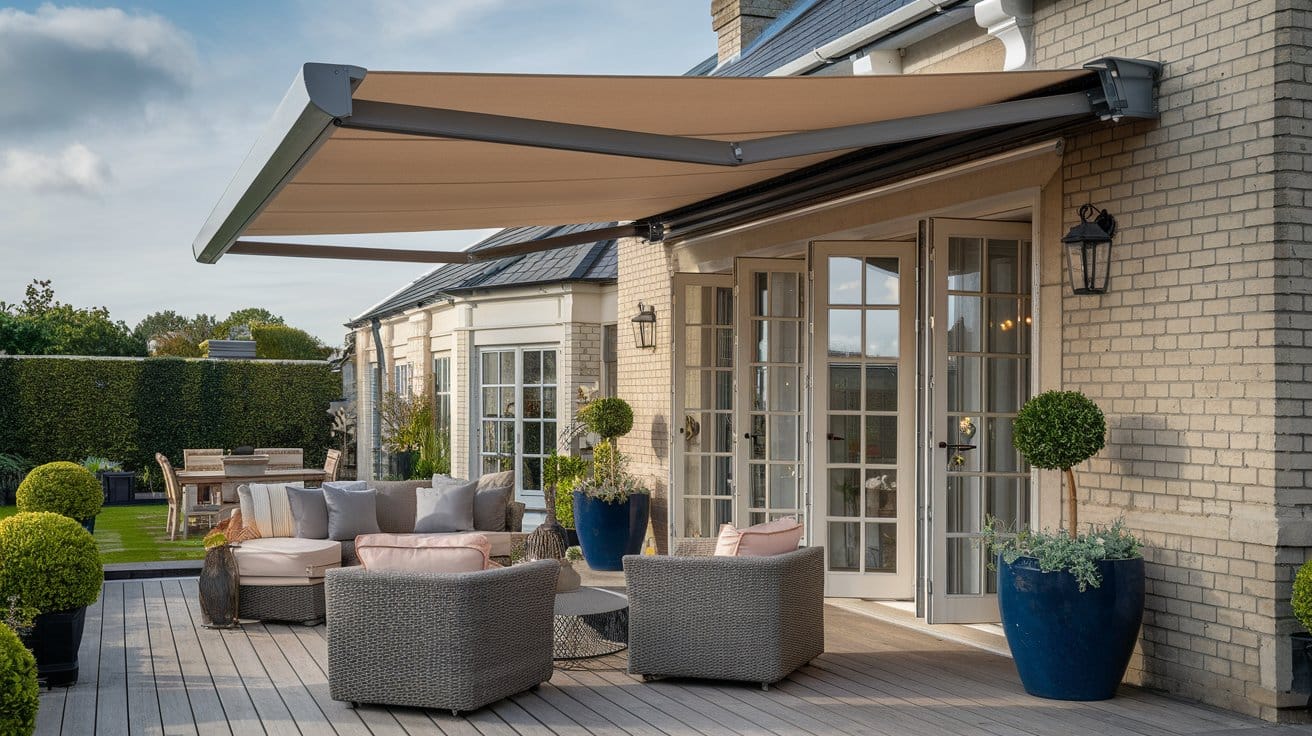
Roof-mounted awnings are a stylish and practical addition to any home, offering a seamless blend of shade, protection, and energy efficiency. Whether you’re looking to create a comfortable outdoor retreat or reduce indoor cooling costs, these awnings provide a sophisticated solution that enhances both aesthetics and functionality.
Key Benefits of Roof-Mounted Awnings
Installing a roof-mounted awning offers numerous advantages, including:
- Enhanced Comfort & Shade – Provides relief from direct sunlight, creating a cooler and more enjoyable outdoor space.
- Energy Efficiency – Reduces indoor temperatures by blocking excessive heat, leading to lower air conditioning costs.
- Weather Protection – Shields outdoor furniture and patios from sun damage and light rain, extending their lifespan.
- Increased Property Value – Adds aesthetic appeal and functional outdoor space, making your home more attractive to potential buyers.
Considerations Before Installation
Before installing a roof-mounted awning, homeowners should evaluate:
- Structural Integrity – Ensure the roof can support the awning’s weight and mounting requirements.
- Wind Exposure – Assess the location’s wind conditions to select an awning with appropriate wind resistance.
- Design Compatibility – Choose an awning style that complements your home’s architecture and enhances curb appeal.
How The Outdoor Living Group Can Help
With over 20 years of expertise in outdoor solutions, The Outdoor Living Group specialises in the design, planning, and installation of premium Weinor awnings. Our team provides tailored consultations, ensuring your awning complements your home while meeting your specific needs. From initial site visits to post-installation support, we offer a seamless experience that guarantees quality and peace of mind.
Book a consultation today and transform your outdoor space with confidence.
What Tools and Materials Are Required for Installation?
Ensuring a Smooth and Efficient Awning Installation
Installing a roof-mounted awning requires careful preparation and the right set of tools and materials. A well-equipped workspace ensures efficiency, precision, and a secure installation that stands the test of time.
Essential Tools for Installation
To successfully mount an awning on your roof, you will need:
- Measuring Tape & Level – Ensures accurate placement and alignment.
- Power Drill & Drill Bits – Required for securing brackets and fasteners.
- Adjustable Wrench & Socket Set – Essential for tightening bolts and securing components.
- Stud Finder – Helps locate secure mounting points on the structure.
- Ladder & Safety Harness – Provides stability and safety when working at heights.
- Sealant & Caulking Gun – Prevents water infiltration around mounting points.
Recommended Materials for Durability
Choosing high-quality materials enhances the longevity and performance of your awning. Consider:
- Weather-Resistant Fasteners – Stainless steel or galvanised bolts prevent rust and corrosion.
- Reinforced Mounting Brackets – Ensure structural stability and wind resistance.
- Waterproof Sealant – Protects against leaks and moisture damage.
- Durable Awning Fabric – UV-resistant and weatherproof materials extend the awning’s lifespan.
Preparation Checklist
Before beginning installation, verify that you have:
✅ All necessary tools and materials
✅ A stable and secure mounting surface
✅ Proper measurements and alignment markings
✅ Safety gear for working at heights
By gathering the right tools and materials, you set the foundation for a seamless and efficient installation process. Proper preparation minimises errors and ensures a sturdy, long-lasting awning that enhances your outdoor space.
How to Prepare Your Space for Awning Installation
Ensuring a Stable and Precise Installation
Proper preparation is essential for a smooth and secure awning installation. By taking the right steps beforehand, you can prevent structural issues, ensure accurate alignment, and enhance the longevity of your awning.
Step 1: Assess Structural Integrity
Before installation, evaluate the strength of your mounting surface. The roof or supporting structure should be capable of handling the awning’s weight and wind loads. Key considerations include:
- Load-Bearing Capacity – Ensure the structure can support the awning without strain.
- Material Suitability – Verify that the mounting surface (e.g., brick, concrete, or reinforced wood) can hold fasteners securely.
- Professional Assessment – If unsure, consult a structural expert to confirm stability.
Step 2: Take Accurate Measurements
Precision is crucial to avoid misalignment and ensure a perfect fit. Follow these steps:
- Measure the Width and Projection – Determine the space required for full awning extension.
- Mark Mounting Points – Use a pencil or chalk to outline bracket positions.
- Check Level Alignment – Use a spirit level to ensure even placement, preventing operational issues.
Step 3: Clear the Installation Area
A clutter-free workspace improves efficiency and safety. Prepare by:
- Removing obstacles that could hinder access.
- Securing ladders or scaffolding for stability.
- Ensuring tools and materials are within reach.
Step 4: Verify Weather Conditions
Plan installation on a dry, calm day. Wind and rain can complicate the process, making it difficult to handle tools and secure components properly.
By following these steps, you create an optimal foundation for a successful awning installation, ensuring durability and seamless operation.
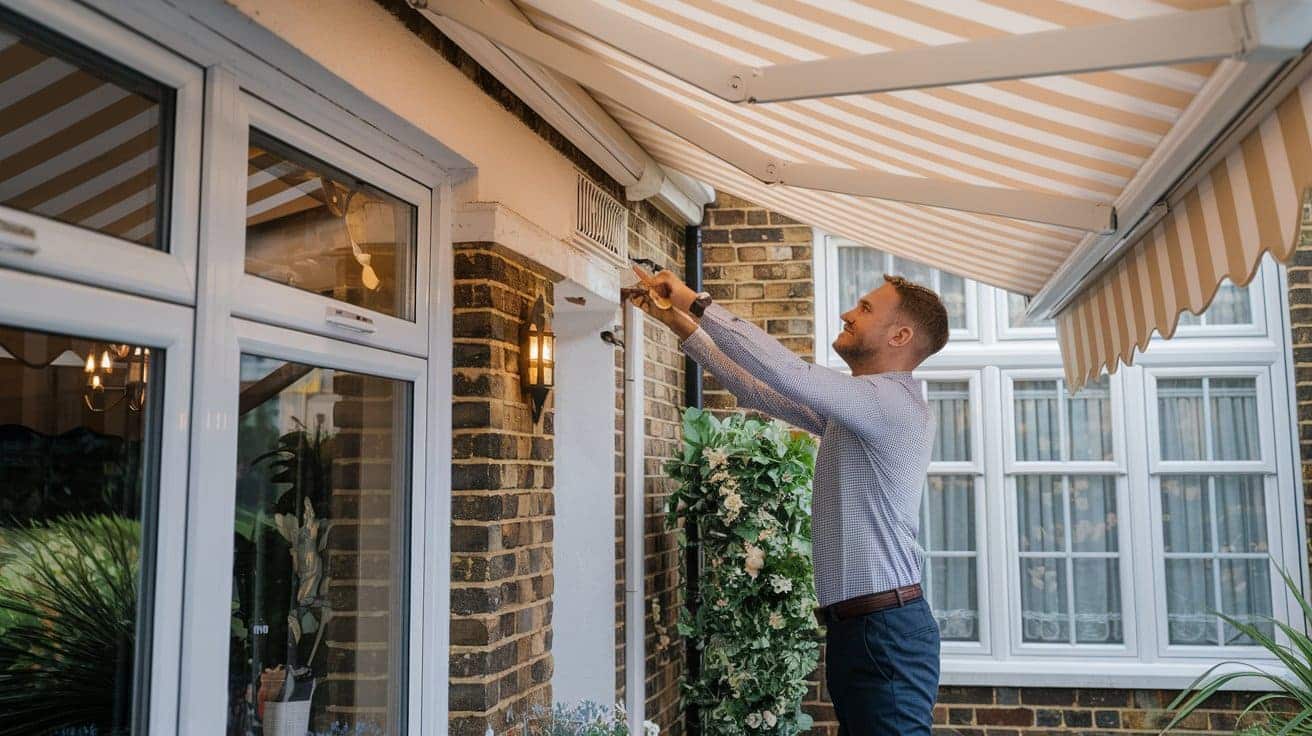
How to Instal Roof-Mounted Awnings: A Step-by-Step Guide
Installing a roof-mounted awning requires precision, preparation, and the right approach to ensure a secure and long-lasting result. Follow this structured guide to complete the installation efficiently and avoid common pitfalls.
Step 1: Mark and Measure
Begin by marking the installation points on your roof. Use a measuring tape to confirm the correct width and projection of the awning. A spirit level ensures proper alignment, preventing operational issues later.
Step 2: Secure the Mounting Brackets
Drill pilot holes at the marked points and attach the mounting brackets using weather-resistant fasteners. Ensure they are tightly secured to provide a stable foundation for the awning.
Step 3: Instal the Awning Cassette
With assistance, lift the awning cassette into place and align it with the brackets. Secure it using the provided bolts, ensuring an even distribution of weight to prevent strain on the structure.
Step 4: Connect Electrical Components (If Applicable)
For motorised awnings, connect the electrical wiring according to the manufacturer’s instructions. Ensure all connections are weatherproof and test the motor before finalising the installation.
Step 5: Adjust and Test
Extend and retract the awning multiple times to check for smooth operation. Adjust the pitch and tension as needed to optimise performance and stability.
Common Mistakes to Avoid
- Incorrect Measurements – Misalignment can lead to operational issues.
- Weak Fastening – Loose bolts can compromise stability.
- Ignoring Wind Exposure – Ensure the awning is rated for local wind conditions.
By following these steps, you ensure a professional-quality installation that enhances your outdoor space with lasting durability.
What Safety Precautions Should Be Taken During Installation?
Ensuring a Safe and Secure Awning Installation
Installing a roof-mounted awning requires careful attention to safety to prevent accidents and ensure a smooth process. By following essential precautions, homeowners can protect themselves and their property while achieving a successful installation.
Recommended Safety Gear
Wearing the right protective equipment minimises risks during installation. Essential safety gear includes:
- Safety Harness and Anchor Points – Prevents falls when working at heights.
- Non-Slip Footwear – Provides stability on sloped or wet surfaces.
- Protective Gloves – Shields hands from sharp edges and tool-related injuries.
- Safety Goggles – Protects eyes from dust, debris, and accidental tool slips.
- Hard Hat – Essential for overhead work to prevent head injuries.
Accident Prevention Tips
Proper planning and awareness can significantly reduce the likelihood of accidents:
- Secure Ladders and Scaffolding – Ensure they are stable and positioned on even ground.
- Check Weather Conditions – Avoid working in high winds or rain, as slippery surfaces increase risks.
- Use the Right Tools – Ensure all equipment is in good working order and suited for the task.
- Work with a Partner – Having assistance improves efficiency and provides an extra layer of safety.
Common Safety Hazards
Being aware of potential hazards helps prevent injuries and installation setbacks:
- Structural Weaknesses – Inspect mounting surfaces for stability before installation.
- Electrical Risks – If installing a motorised awning, ensure electrical connections are handled safely.
- Falling Objects – Keep tools and materials secure to prevent them from falling and causing injury.
The Importance of Safety in Installation
Prioritising safety not only protects individuals but also ensures a secure and long-lasting awning installation. A well-executed, hazard-free process leads to better results, minimising costly mistakes and future maintenance issues.
How to Maintain and Care for Your Roof-Mounted Awning
Ensuring Longevity and Optimal Performance
A well-maintained roof-mounted awning not only enhances your outdoor space but also extends its lifespan, ensuring continued protection and aesthetic appeal. Regular upkeep prevents premature wear, safeguards functionality, and preserves the awning’s structural integrity.
Routine Maintenance Tasks
Consistent care is key to keeping your awning in peak condition. Essential maintenance includes:
- Inspecting Moving Parts – Check for loose bolts, misaligned arms, or signs of strain in the mechanism.
- Lubricating Joints – Apply silicone-based lubricant to hinges and retractable components to ensure smooth operation.
- Checking Fabric Tension – Ensure the fabric remains taut to prevent sagging and wind damage.
Effective Cleaning Techniques
Dirt, debris, and environmental pollutants can accumulate over time, affecting both appearance and durability. To clean your awning effectively:
- Use Mild Soap and Water – Avoid harsh chemicals that may degrade the fabric’s protective coating.
- Soft Brush or Cloth – Gently scrub to remove dirt without damaging the material.
- Rinse and Air Dry – Prevent moisture buildup by allowing the awning to dry completely before retracting.
Monitoring for Wear and Damage
Regular inspections help identify potential issues before they escalate. Look for:
- Fraying or Tearing – Small fabric damages can worsen if left unaddressed.
- Rust or Corrosion – Metal components should remain free of rust to maintain structural integrity.
- Motor Functionality – For motorised awnings, ensure smooth extension and retraction without unusual noises.
The Impact of Maintenance on Lifespan
Proactive care significantly extends the longevity of your awning, reducing the need for costly repairs or premature replacements. By integrating these maintenance practices into your routine, you ensure that your awning remains a reliable and stylish addition to your outdoor space for years to come.
How to Troubleshoot Common Awning Installation Issues
Ensuring a Smooth and Successful Installation
Even with careful planning, awning installations can sometimes present challenges. Identifying and resolving these issues promptly ensures a secure and long-lasting setup. Below are common installation problems and their solutions.
1. Misalignment or Uneven Installation
One of the most frequent issues is an awning that appears crooked or does not extend evenly. This can result from inaccurate measurements or improper bracket placement.
Solution:
- Double-check all measurements before drilling.
- Use a spirit level to ensure brackets are aligned correctly.
- Adjust the mounting points if necessary to achieve a balanced installation.
2. Awning Fabric Sagging or Wrinkling
Loose or sagging fabric can affect both the appearance and functionality of the awning. This often occurs due to incorrect tensioning or improper installation of the retractable arms.
Solution:
- Ensure the fabric is properly tensioned according to the manufacturer’s guidelines.
- Tighten any loose bolts or fasteners that may be affecting the arm mechanism.
- If the issue persists, inspect the awning’s support arms for misalignment.
3. Difficulty in Extending or Retracting the Awning
Awnings that do not open or close smoothly may have obstructions, mechanical issues, or improper installation.
Solution:
- Check for debris or obstructions in the awning’s tracks.
- Lubricate moving parts with a silicone-based spray to improve operation.
- If motorised, verify electrical connections and test the power supply.
4. Bracket Instability or Loose Fasteners
Weak or unstable brackets can compromise the awning’s durability, especially in windy conditions.
Solution:
- Ensure brackets are mounted on a solid structural surface.
- Use appropriate fasteners for the material (e.g., masonry anchors for brick walls).
- Tighten all bolts and screws securely, checking for any signs of movement.
5. Water Pooling on the Awning Fabric
If water accumulates on the awning after rain, it can lead to fabric damage and strain on the structure.
Solution:
- Adjust the pitch of the awning to allow proper water runoff.
- Ensure the fabric is stretched correctly to prevent sagging.
- Regularly check for debris that may obstruct drainage.
When to Seek Professional Help
While many issues can be resolved with adjustments, some problems—such as significant structural concerns or motor malfunctions—may require expert assistance. If troubleshooting does not resolve the issue, consulting a professional ensures the awning remains safe and functional.
By addressing these common installation challenges, homeowners can enjoy a well-installed, durable awning that enhances their outdoor space for years to come.
Contact The Outdoor Living Group for Expert Awning Installation
Transform Your Outdoor Space with Professional Expertise
At The Outdoor Living Group, we specialise in providing high-quality Weinor awning solutions tailored to your home. With over 20 years of experience, our team ensures a seamless installation process, combining precision engineering with stylish design. Whether you’re looking to enhance your patio, balcony, or conservatory, our expert consultation and installation services guarantee a perfect fit for your outdoor space.
Our Comprehensive Awning Services
We offer a full range of services to support your awning needs, including:
- Bespoke Consultation & Design – Our specialists assess your space and recommend the ideal awning solution tailored to your requirements.
- Professional Installation – Our skilled technicians ensure a secure and precise installation, optimising durability and performance.
- Post-Installation Support – We provide maintenance guidance, warranty handling, and service calls to keep your awning in top condition.
Why Choose Professional Installation?
Opting for professional installation ensures:
✔ Structural Integrity – Secure mounting for long-lasting stability.
✔ Optimal Performance – Proper alignment and tensioning for smooth operation.
✔ Peace of Mind – Expert handling of electrical components and weatherproofing.
Schedule Your Consultation Today
Ready to enhance your outdoor space? Contact The Outdoor Living Group today to schedule a consultation. Our team is here to guide you through every step, ensuring a seamless and stress-free experience.
Call us now or visit our website to explore our range of Weinor awnings and expert services.
FAQ’s
What Advantages Do Roof-Mounted Awnings Offer?
Roof-mounted awnings provide a perfect blend of functionality and aesthetics, transforming outdoor spaces into comfortable, energy-efficient retreats. Whether shielding against harsh sunlight or enhancing curb appeal, these awnings offer several benefits that elevate both residential and commercial properties.
Energy Efficiency and Cost Savings
By blocking direct sunlight, roof-mounted awnings help regulate indoor temperatures, reducing reliance on air conditioning. This natural cooling effect leads to:
- Lower energy consumption, resulting in reduced utility bills.
- Enhanced insulation, preventing heat buildup inside the home.
- Sustainable living, minimising environmental impact through passive cooling.
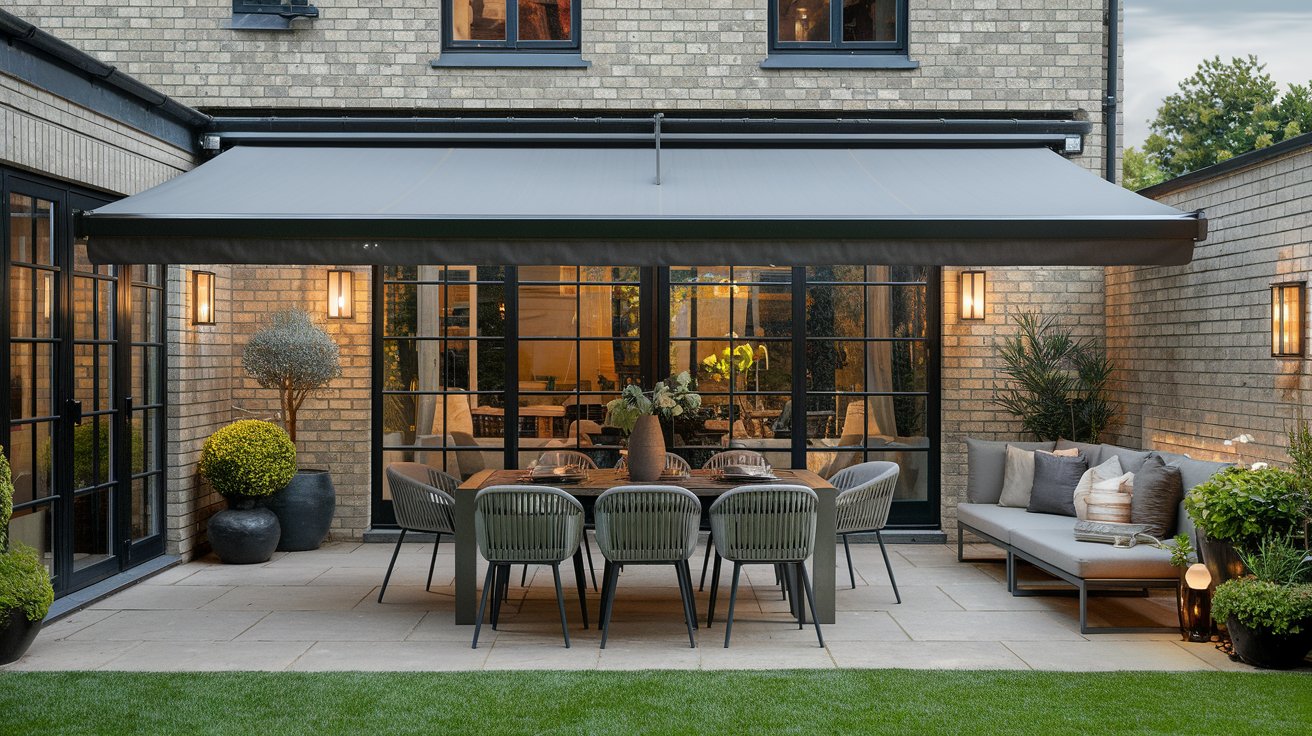
Aesthetic Enhancement of Outdoor Spaces
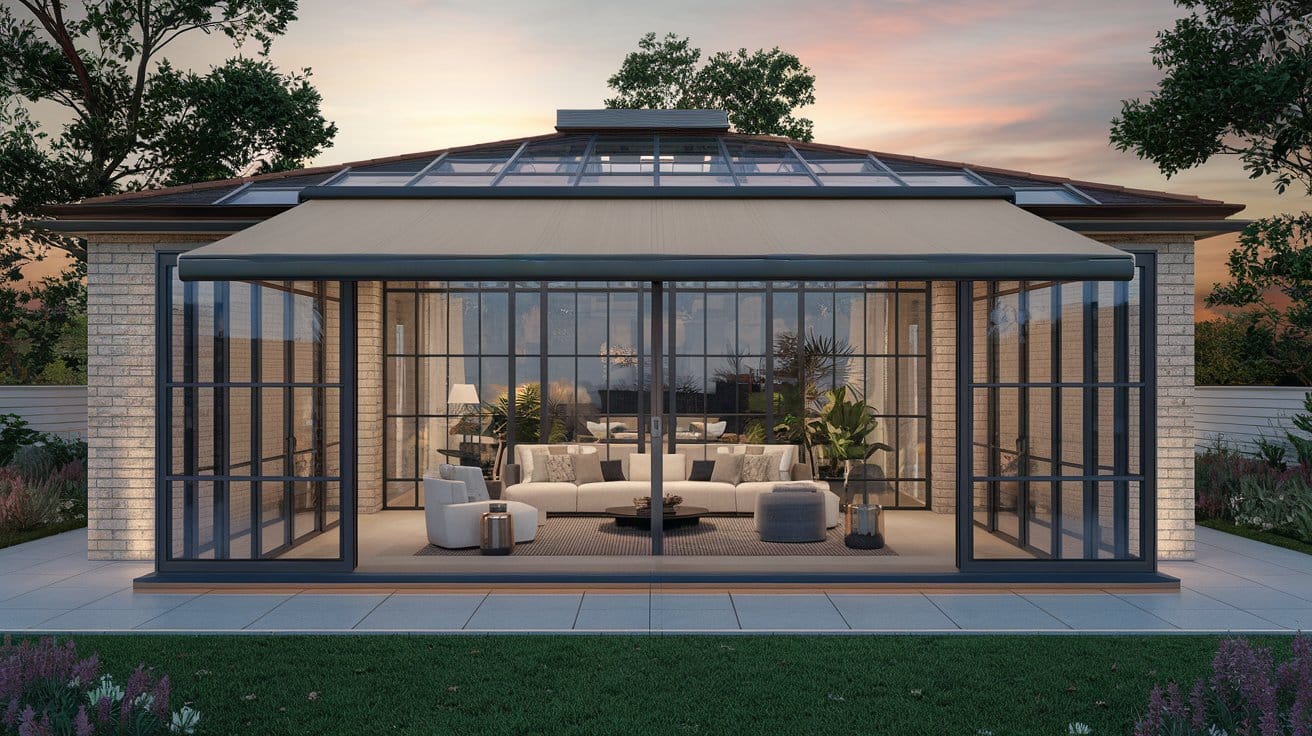
Awnings add a sophisticated touch to patios, balconies, and terraces, creating a visually appealing extension of indoor living areas. With a variety of fabric patterns, frame colours, and design options available, they can be customised to complement any architectural style, enhancing the overall ambiance of a property.
Increased Property Value
A well-designed outdoor space enhances a home’s market appeal. Roof-mounted awnings:
- Expand usable outdoor areas, making them more functional.
- Improve curb appeal, adding a refined architectural element.
- Increase buyer interest by offering a stylish and practical feature.
Protection from Weather Elements
Beyond sun protection, awnings shield outdoor furniture and flooring from UV damage, rain, and wind. This added layer of defence helps preserve the longevity of exterior furnishings, reducing maintenance costs and ensuring year-round usability of outdoor spaces.
By integrating style with practicality, roof-mounted awnings offer a long-term investment in comfort, efficiency, and property value.
What Factors Should Be Considered When Selecting an Awning?
Choosing the right roof-mounted awning for your home involves balancing functionality, durability, and aesthetics. A well-selected awning enhances outdoor comfort, complements architectural design, and provides long-term protection against the elements.
Size and Fit: Ensuring the Perfect Coverage
The dimensions of your awning should align with the space you want to shade. Consider:
Width & Projection – Ensure the awning extends far enough to provide adequate shade without obstructing pathways.
Mounting Constraints – Verify that your roof structure can support the installation.
Adjustability – Some models offer retractable or tilting features for greater flexibility.
Material Options and Durability
The longevity of your awning depends on the quality of its materials:
Frame Construction – Powder-coated aluminium resists corrosion and withstands harsh weather.
Fabric Selection – UV-resistant, waterproof textiles like acrylic or polyester ensure long-term performance.
Wind Resistance – Opt for reinforced arms and secure mounting systems for stability in breezy conditions.
Design Considerations: Blending Functionality with Style
Awnings should seamlessly integrate with your home’s aesthetic:
Cassette Type – Full-cassette awnings provide maximum fabric protection, while semi-cassette and open designs offer lighter alternatives.
Colour and Pattern Choices – A wide range of fabric and frame colours allows for personalization.
Integrated Features – LED lighting and heating systems enhance usability during evenings and cooler months.
Compatibility with Home Architecture
The awning should complement your home’s structure and enhance its curb appeal:
Modern Homes – Sleek, cubic designs like the Kubata blend seamlessly with contemporary exteriors.
Traditional Homes – Classic models such as the Opal Design II offer timeless elegance.
Multi-Use Spaces – Pergola-style awnings like the Plaza Viva provide extended coverage for patios and terraces.
By carefully considering these factors, you can select an awning that enhances your outdoor space while ensuring durability and aesthetic harmony.
Is DIY Installation Feasible for Roof-Mounted Awnings?
Installing a roof-mounted awning yourself can be an appealing option, but it requires careful consideration of skills, tools, and potential challenges. While a DIY approach may offer cost savings, ensuring a secure and long-lasting installation demands precision and expertise.
Skills Required for DIY Installation
A successful installation requires:
Proficiency in Carpentry and Drilling – Ensuring proper bracket placement and secure fastening.
Accurate Measurement Techniques – Preventing misalignment issues that could affect functionality.
Understanding of Structural Load – Assessing the roof’s ability to support the awning’s weight and wind resistance.
Basic Electrical Knowledge (for Motorised Awnings) – Safely handling wiring and automation components.
Essential Tools and Equipment
To complete the installation, you’ll need:
Drilling Equipment with Appropriate Bits – Ensuring secure attachment to various surfaces.
Precision Measuring Instruments – Guaranteeing accurate alignment and level positioning.
Ladders and Safety Harnesses – Providing stability when working at heights.
Fastening and Tensioning Tools – Securing bolts and adjusting awning tension effectively.
Challenges and Risks
DIY installation presents several challenges, including:
Structural Instability – Incorrect mounting can lead to long-term damage.
Wind Load Considerations – Improper fastening may compromise durability.
Electrical Safety Concerns – Incorrect wiring can pose fire hazards.
Time and Effort – The process can be labour-intensive and time-consuming.
Comparing DIY vs. Professional Installation
While DIY installation is possible, professional installation ensures:
✔ Precise Alignment – Avoiding operational issues.
✔ Structural Integrity – Secure mounting for long-term durability.
✔ Expert Handling of Electrical Components – Ensuring safety and compliance.
For those without prior experience, professional installation provides peace of mind, guaranteeing a seamless and efficient setup.
What Maintenance Practices Ensure Awning Longevity?
A well-maintained roof-mounted awning enhances your outdoor space while ensuring durability and optimal performance. Regular upkeep prevents premature wear, safeguards functionality, and preserves structural integrity.
Routine Cleaning and Care
Keeping your awning clean prevents dirt buildup and extends its lifespan.
Gentle Washing – Use a mild detergent mixed with lukewarm water to remove dust and stains.
Soft Brushing – A non-abrasive brush helps lift debris without damaging the fabric.
Thorough Rinsing – Ensure all soap residue is washed away to prevent discoloration.
Complete Drying – Retract the awning only when fully dry to avoid mould and mildew.
Monitoring for Wear and Tear
Regular inspections help identify minor issues before they escalate.
Fabric Condition – Look for fraying, fading, or small tears that may require patching.
Frame and Joints – Check for rust, loose bolts, or misaligned components.
Retraction Mechanism – Ensure smooth operation without resistance or unusual noises.
Seasonal Maintenance Tips
Different weather conditions require specific care strategies.
Spring & Summer – Clear pollen and dust accumulation to maintain a fresh appearance.
Autumn – Remove fallen leaves and debris to prevent clogging and excess weight.
Winter – Retract the awning during heavy snow or storms to prevent structural strain.
The Impact of Regular Maintenance
Consistent care extends the lifespan of your awning, ensuring it remains a reliable and stylish addition to your outdoor space. By integrating these maintenance practices, you enhance both functionality and aesthetic appeal for years to come.
How Can I Prevent Installation Errors?
Installing a roof-mounted awning requires precision and attention to detail. Avoiding common mistakes ensures a secure, long-lasting installation that enhances both functionality and aesthetics.
1. Ensuring Accurate Measurements
Incorrect dimensions can lead to misalignment, improper extension, and structural instability.
✔ Double-check width and projection measurements before marking installation points.
✔ Use a spirit level to confirm even alignment and prevent operational issues.
✔ Account for clearance space to ensure smooth awning extension and retraction.
2. Verifying Structural Integrity
An unstable mounting surface can compromise the awning’s durability, especially in high-wind conditions.
✔ Assess the load-bearing capacity of the roof or wall before installation.
✔ Select fasteners suited to the mounting material, ensuring a firm grip.
✔ Reinforce weak attachment points with additional brackets or support structures.
3. Using the Right Tools and Techniques
Improper tool selection or incorrect fastening methods can weaken the installation.
✔ Choose a power drill with the appropriate bit size for secure anchoring.
✔ Tighten all bolts and screws to manufacturer specifications to prevent loosening.
✔ Apply weatherproof sealant around mounting points to protect against moisture infiltration.
4. Seeking Professional Guidance When Needed
While DIY installation is possible, professional expertise can prevent costly errors.
✔ Refer to manufacturer guidelines for best practices and safety recommendations.
✔ Consult a structural expert if unsure about load-bearing capacity or mounting feasibility.
✔ Engage a professional installer for complex setups or motorised awnings.
By following these best practices, you can achieve a stable, well-functioning awning installation that enhances your outdoor space for years to come.
How The Outdoor Living Group Can Assist with Your Awning Needs
Comprehensive Installation Services
At The Outdoor Living Group, we specialise in the professional installation of Weinor awnings, ensuring a seamless and secure fit for your outdoor space. Our trained experts handle every aspect of the process, from precise site measurements to structural integrity checks, guaranteeing that your awning is installed with maximum durability and functionality. Whether you require a Pergola Awning like the Plaza Viva or a Full-Cassette Awning such as the Opal Design II, we tailor our approach to suit your specific requirements.
Expert Consultation and Custom Solutions
We understand that every home is unique, which is why we offer personalised consultations to help you select the perfect awning for your property. Our specialists guide you through:
Awning selection based on your space, style, and functional needs.
Customization options, including LED lighting, heating systems, and Smart Home integration.
Structural compatibility assessments to ensure a flawless installation.
Post-Installation Support and Maintenance
Our commitment to quality extends beyond installation. We provide:
Maintenance services to keep your awning in peak condition.
Warranty handling for long-term peace of mind.
Service calls and troubleshooting to address any concerns promptly.
Customer Satisfaction Guarantee
With over 20 years of experience, The Outdoor Living Group is dedicated to delivering high-quality service, expert craftsmanship, and premium German-engineered Weinor awnings. Our goal is to enhance your outdoor space with style, durability, and complete peace of mind.
📞 Contact us today to schedule your consultation and discover the perfect awning for your home.