Discover the Essential Steps for Open Patio Awning Installation
Enhance Your Outdoor Space with a Well-Installed Awning
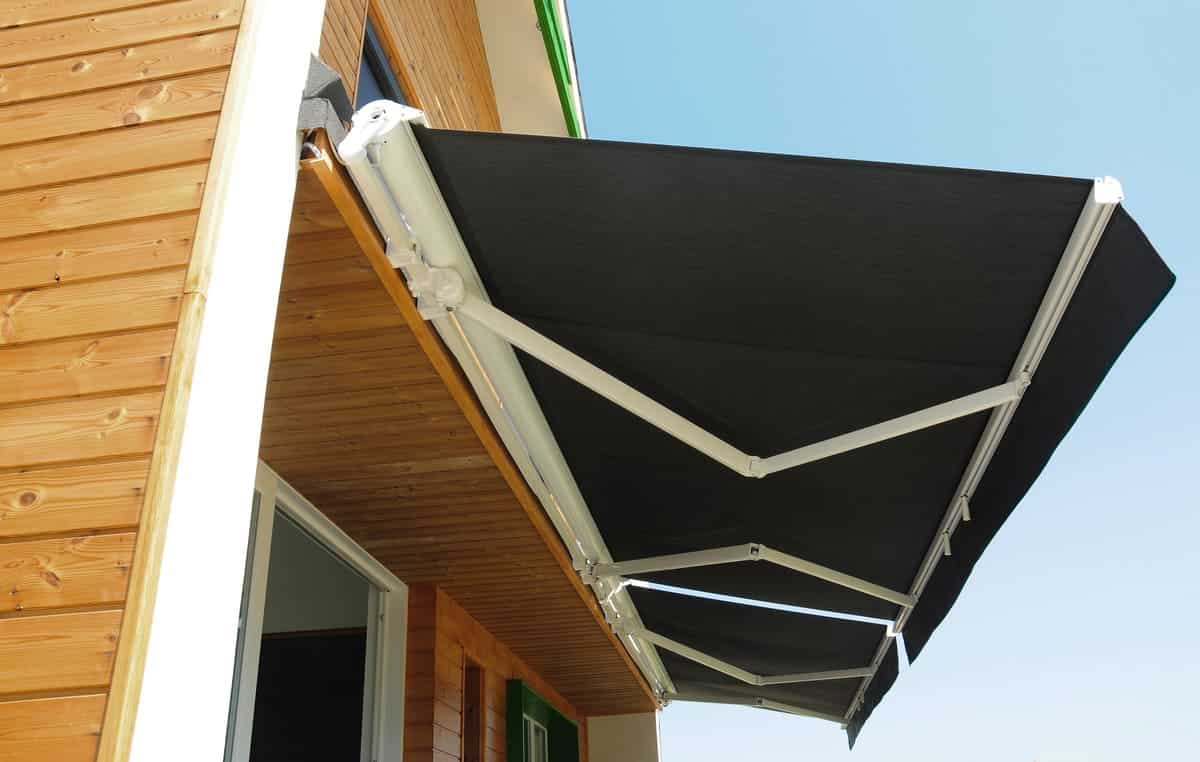
An open patio awning is more than just a shade solution—it transforms your outdoor space into a comfortable, stylish, and functional retreat. Whether you’re looking to create a cosy relaxation area or protect your patio from the elements, proper installation is key to maximising the benefits of your awning.
Why Proper Installation Matters
A well-installed awning ensures durability, stability, and optimal performance. When mounted correctly, it provides reliable protection against sun, wind, and light rain while maintaining its structural integrity over time. Poor installation, on the other hand, can lead to misalignment, fabric tension issues, and even structural damage, reducing the lifespan of your investment.
Key Benefits of Installing an Open Patio Awning
- Enhanced Comfort: Provides shade and temperature control, making outdoor spaces more enjoyable.
- UV Protection: Shields you and your furniture from harmful UV rays, preventing fading and sun damage.
- Energy Efficiency: Reduces indoor heat gain, lowering cooling costs during warmer months.
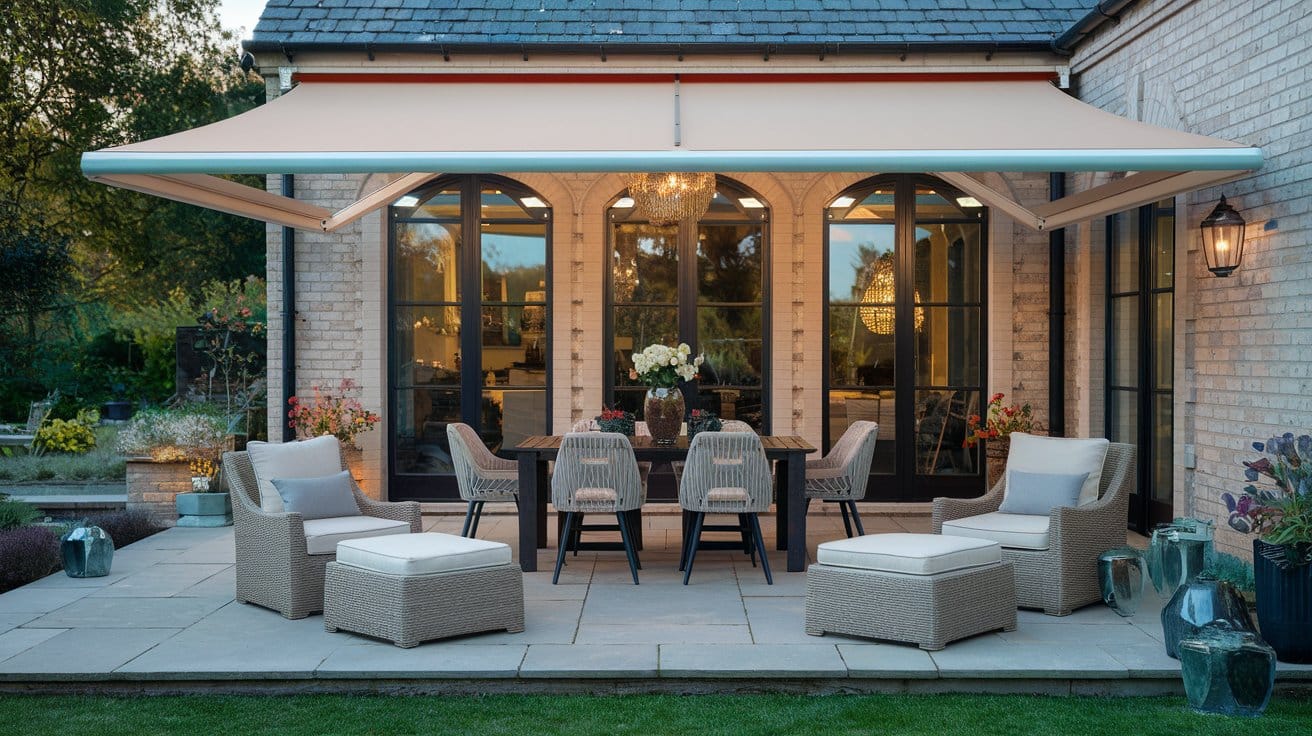
- Aesthetic Appeal: Complements your home’s exterior, adding a stylish and functional element to your patio.
- Increased Usability: Extends your living space, allowing you to enjoy the outdoors in various weather conditions.
Considerations Before Installation
Before beginning the installation process, homeowners should assess their patio structure, determine the best mounting location, and ensure they have the necessary tools and materials. Factors such as wall strength, wind exposure, and awning size should be carefully evaluated to achieve a secure and lasting installation.
How The Outdoor Living Group Can Help
At The Outdoor Living Group, we specialise in professional awning installation, ensuring precision and durability. With over 20 years of expertise, we provide tailored solutions, expert consultations, and high-quality Weinor awnings designed for long-term performance. Contact us today to schedule a consultation and bring your outdoor vision to life.
What Tools and Materials Are Needed for Installation?
Essential Tools for a Seamless Awning Installation
Installing an open patio awning requires precision, and having the right tools ensures a smooth and efficient process. Essential tools include:
- Measuring Tape & Level: Ensures accurate measurements and alignment.
- Drill & Masonry Bits: Required for securing brackets into walls or ceilings.
- Adjustable Wrench & Socket Set: Helps in tightening bolts and securing components.
- Stud Finder: Locates secure mounting points on walls or beams.
- Ladders & Safety Gear: Provides stability and protection during installation.
Importance of Quality Materials
The durability and performance of an awning depend on the materials used. High-quality brackets, stainless steel fasteners, and corrosion-resistant coatings enhance longevity. The awning fabric should be UV-resistant, waterproof, and capable of withstanding varying weather conditions.
Selecting the Right Tools and Materials
Choosing tools and materials suited to your specific installation environment is crucial. Consider:
- Surface Type: Different wall materials (brick, wood, concrete) require specific fasteners.
- Weather Conditions: Opt for rust-resistant hardware in humid climates.
- Awning Size & Weight: Ensure brackets and supports can handle the load.
Preparing for Installation
Before starting, organise all tools and materials, ensuring easy access. Double-check measurements and confirm that all necessary components are included. Proper preparation minimises errors and streamlines the installation process, leading to a secure and long-lasting awning setup.
How to Prepare for Installation?
Laying the Groundwork for a Smooth Awning Installation
Proper preparation is the foundation of a successful open patio awning installation. Taking the time to assess the site, gather necessary tools, and ensure safety measures are in place can prevent costly mistakes and streamline the process.
Step 1: Conduct a Thorough Site Inspection
Before installation begins, evaluate the mounting surface to confirm its structural integrity. Walls, beams, or ceilings must be sturdy enough to support the weight of the awning. Use a measuring tape and level to determine the exact placement, ensuring proper alignment and sufficient clearance for full extension.
Step 2: Prepare the Installation Area
Clear the workspace of any obstacles, furniture, or decor that might hinder movement. If mounting on a wall, check for obstructions such as electrical wiring or drainage pipes. For ceiling-mounted awnings, ensure that the surface can accommodate the necessary brackets and fasteners.
Step 3: Check Tools and Materials
Having the right tools on hand is essential for a smooth installation. Verify that all required components—brackets, fasteners, and support arms—are included in the package. Inspect tools such as drills, wrenches, and stud finders to confirm they are in good working condition.
Step 4: Prioritise Safety Measures
Safety should never be overlooked. Wear protective gloves, safety goggles, and non-slip footwear to prevent injuries. If using ladders, ensure they are stable and positioned on even ground. For motorised awnings, turn off power sources before handling electrical connections.
Why Preparation Matters
Skipping these preparatory steps can lead to misalignment, weak mounting, or even damage to the awning. A well-prepared installation site ensures a secure, long-lasting setup, allowing you to enjoy the benefits of your open patio awning with confidence.
Step-by-Step Guide to Installing an Open Patio Awning
1. Initial Setup and Alignment
Begin by marking the mounting points on your wall or ceiling, ensuring they align with the awning’s brackets. Use a measuring tape and level to verify accuracy and prevent misalignment. If installing on a brick or concrete surface, a masonry drill bit is essential for creating secure anchor points.
2. Mounting and Securing the Awning
Once the mounting points are prepared:
- Attach the brackets using heavy-duty expansion bolts or lag screws, depending on the surface material.
- Ensure each bracket is firmly secured before positioning the awning.
- With assistance, lift the awning into place and fasten it to the brackets, ensuring it sits evenly.
- For motorised models, connect the electrical components according to the manufacturer’s instructions, ensuring proper wiring and weatherproofing.
3. Final Adjustments and Functionality Checks
After securing the awning:
- Extend and retract it multiple times to confirm smooth operation.
- Adjust the pitch and tension settings to optimise shade coverage and stability.
- Inspect all fasteners, ensuring they are tight and secure.
- If the awning includes LED lighting or heating elements, test their functionality before finalising the installation.
4. Ensuring a Professional-Quality Finish
A meticulous approach prevents common installation errors, such as misalignment or inadequate support. By following these structured steps, you ensure a durable, well-functioning awning that enhances your outdoor space for years to come.
Why Are Safety Considerations Important?
Ensuring a Secure and Efficient Awning Installation
Installing an open patio awning requires precision, stability, and adherence to safety protocols. Overlooking safety measures can lead to structural failures, personal injury, or damage to the installation site. By prioritising safety, homeowners and installers can ensure a smooth, risk-free process while extending the longevity of the awning.
Essential Safety Gear
Proper protective equipment is crucial when handling tools and heavy components. Recommended safety gear includes:
- Protective Gloves: Prevent cuts and abrasions when handling metal brackets and fasteners.
- Safety Goggles: Shield eyes from dust, debris, and accidental tool slips.
- Non-Slip Footwear: Ensures stability when working on ladders or uneven surfaces.
- Harness and Ladder Stabilisers: Essential for high installations to prevent falls.
Identifying and Mitigating Hazards
Before installation begins, assess the workspace for potential risks:
- Check for Electrical Wiring: Avoid drilling into concealed power lines.
- Inspect Mounting Surfaces: Ensure walls or beams can support the awning’s weight.
- Secure the Work Area: Remove obstacles that could cause tripping or restricted movement.
Safe Handling of Tools and Materials
Using tools correctly minimises the risk of accidents:
- Drills and Power Tools: Operate with a firm grip and use appropriate drill bits for the surface.
- Heavy Components: Lift with proper posture or seek assistance to prevent strain.
- Fasteners and Brackets: Ensure all connections are tightened securely to prevent structural failure.
Emergency Procedures and First Aid
Despite precautions, accidents can occur. Keep a first aid kit nearby, and be prepared to address minor injuries such as cuts or bruises. In case of severe incidents, knowing emergency contact numbers and having a plan for quick response is essential.
The Importance of Safety in Installation
A well-installed awning enhances outdoor comfort, but safety should never be compromised. By following these guidelines, installers can ensure a secure, durable, and hazard-free setup, allowing homeowners to enjoy their outdoor space with confidence.

Common Installation Mistakes and How to Avoid Them
Installing an open patio awning requires precision and careful planning. Even minor errors can lead to structural instability, reduced functionality, or premature wear. By understanding common installation mistakes, you can take proactive steps to ensure a secure and long-lasting setup.
1. Misalignment and Measurement Errors
One of the most frequent mistakes is improper measurements, which can result in an awning that doesn’t fit correctly or fails to extend smoothly. To prevent this:
- Use a measuring tape and level to mark accurate mounting points.
- Double-check dimensions before drilling or securing brackets.
- Ensure the awning is aligned with the intended shading area to maximise coverage.
2. Improper Securing and Mounting
Awnings must be firmly anchored to withstand wind and weather conditions. Common errors include:
- Using inadequate fasteners that don’t support the weight of the awning.
- Failing to secure brackets to structural beams or load-bearing walls.
- Over-tightening bolts, which can weaken the mounting points.
To avoid these issues, always use heavy-duty expansion bolts or lag screws suited to your mounting surface.
3. Neglecting Safety Precautions
Skipping safety measures can lead to accidents or damage. Key precautions include:
- Wearing protective gloves and safety goggles when handling tools.
- Ensuring ladders are stable and positioned on even ground.
- Checking for hidden electrical wiring before drilling into walls.
4. Inadequate Preparation and Planning
Rushing into installation without proper preparation can cause delays and mistakes. Before starting, ensure:
- The installation area is clear of obstacles.
- All necessary tools and materials are readily available.
- The awning’s pitch and tension settings are adjusted for optimal performance.
Learning from Others’ Mistakes
By recognising these common pitfalls, you can take a more methodical approach to installation. A well-planned and correctly executed setup ensures your awning provides reliable shade, protection, and aesthetic appeal for years to come.
How to Maintain and Care for Your Awning?
Preserving the Longevity and Performance of Your Awning
A well-maintained open patio awning not only enhances your outdoor space but also ensures long-term durability and functionality. Regular upkeep prevents wear and tear, keeping your awning in optimal condition throughout the seasons.
Routine Cleaning and Upkeep
Dirt, dust, and environmental debris can accumulate on the fabric and frame, affecting both appearance and performance. To maintain cleanliness:
- Use a soft brush or low-pressure hose to remove loose dirt.
- Clean the fabric with mild soap and water, avoiding harsh chemicals that may degrade the material.
- Allow the awning to dry completely before retracting to prevent mould and mildew buildup.
Inspecting for Wear and Tear
Regular inspections help identify potential issues before they escalate. Key areas to check include:
- Fabric Integrity: Look for signs of fading, fraying, or small tears.
- Frame and Joints: Ensure brackets, arms, and fasteners remain secure and rust-free.
- Motorised Components: Test remote controls and automation systems for smooth operation.
Seasonal Maintenance Tips
Different weather conditions require specific care:
- Before winter: Retract the awning during heavy snow or storms to prevent strain on the frame.
- During summer: Ensure UV-resistant coatings remain intact to prevent sun damage.
- After rain: Wipe down excess moisture to avoid water pooling and mildew formation.
Repair and Replacement Guidelines
Address minor issues promptly to prevent costly repairs:
- Small fabric tears can be patched with awning repair tape.
- Loose bolts should be tightened to maintain structural stability.
- If the awning struggles to extend or retract, inspect the motor or manual crank for obstructions.
The Impact of Regular Maintenance
Consistent care extends the lifespan of your awning, ensuring it remains a reliable and stylish addition to your outdoor space. By following these maintenance practices, you can enjoy uninterrupted shade and protection for years to come.
Contact The Outdoor Living Group Today
Expert Awning Installation for a Seamless Outdoor Experience
Transforming your outdoor space with a high-quality Weinor awning requires precision, expertise, and the right installation approach. At The Outdoor Living Group, we specialise in providing professional awning installation services, ensuring that your investment is secure, durable, and perfectly aligned with your outdoor vision.
Why Choose Professional Installation?
While DIY installation may seem appealing, professional expertise guarantees a flawless setup that enhances both functionality and longevity. Our team ensures:
- Precision Mounting: Secure installation tailored to your property’s structure.
- Structural Integrity: Proper alignment and load distribution to withstand varying weather conditions.
- Seamless Integration: Awnings that complement your home’s aesthetics while maximising shade and comfort.
Our Services and Expertise
With over 20 years of experience, we offer:
- Bespoke Consultation: Tailored advice to help you choose the perfect Weinor awning.
- Full Installation Service: From site assessment to final adjustments, we handle every step.
- Post-Installation Support: Maintenance guidance and aftercare to keep your awning in top condition.
Get in Touch
Ready to elevate your outdoor space? Contact The Outdoor Living Group today for expert consultation and professional installation. Our team is here to help you create a stylish, functional, and weather-resistant outdoor retreat.
Call us now or visit our website to schedule a consultation. Let’s bring your outdoor vision to life with precision and expertise.
FAQ’s
What Are the Basic Steps for Installing an Open Patio Awning?
Laying the Foundation for a Secure and Functional Awning
Installing an open patio awning requires careful planning and precise execution to ensure stability, durability, and optimal performance. By following a structured approach, you can achieve a professional-quality installation that enhances your outdoor space.
Step 1: Assess and Prepare the Installation Site
Start by evaluating the mounting surface—whether it’s a wall, ceiling, or beam—to ensure it can support the awning’s weight. Use a measuring tape and level to mark the exact placement of the brackets, ensuring proper alignment. Clear the area of any obstacles and confirm that no electrical wiring or drainage pipes interfere with the installation.
Step 2: Gather Tools and Materials
Having the right tools on hand streamlines the process. Essential items include:
- Drill with masonry bits – For securing brackets into walls or ceilings.
- Adjustable wrench & socket set – Helps tighten bolts and secure components.
- Stud finder – Locates secure mounting points on walls or beams.
- Ladder & safety gear – Ensures stability and protection during installation.
Step 3: Secure the Mounting Brackets
Drill pilot holes at the marked locations and attach the brackets using heavy-duty expansion bolts or lag screws, depending on the surface material. Double-check that the brackets are level and firmly secured before proceeding.
Step 4: Instal the Awning
With assistance, lift the awning into place and fasten it to the brackets. Ensure all connections are tight and secure. If the awning is motorised, follow the manufacturer’s instructions for wiring and weatherproofing.
Step 5: Final Adjustments and Testing
Extend and retract the awning multiple times to verify smooth operation. Adjust the pitch and tension settings for optimal shade coverage and wind resistance. Inspect all fasteners and components to confirm stability.
Overcoming Common Challenges
Misalignment, weak mounting, and improper tensioning are common pitfalls. Taking precise measurements, using the correct fasteners, and following a structured guide can prevent these issues, ensuring a flawless installation.
By adhering to these steps, you can confidently instal an open patio awning that provides lasting shade, protection, and aesthetic appeal.
What Tools Are Essential for Installing an Open Patio Awning?
Ensuring a Smooth and Secure Installation
Installing an open patio awning requires precision and the right set of tools to ensure stability and longevity. Proper equipment not only simplifies the process but also enhances the durability of the installation.
Key Tools for a Successful Installation
- Precision Measurement Tools: A laser level and measuring tape help ensure accurate placement, preventing misalignment that could affect the awning’s functionality.
- Drilling Equipment: A power drill with masonry and wood bits is essential for securing brackets into various surfaces, whether brick, concrete, or timber.
- Fastening Tools: A socket wrench set and adjustable spanner provide the necessary torque to tighten bolts and fasteners securely.
- Structural Support Tools: A stud finder helps locate secure mounting points, ensuring the awning is anchored to a load-bearing structure.
- Safety and Accessibility Gear: A sturdy ladder, safety goggles, and protective gloves safeguard against potential hazards during installation.
Why Quality Tools Matter
Using high-quality tools minimises errors and ensures a professional-grade installation. A reliable level prevents uneven mounting, while a powerful drill reduces the risk of structural damage. Investing in durable tools enhances efficiency and prevents unnecessary delays.
Preparing Your Tools for Installation
Before starting, organise all tools in an accessible workspace. Verify that drill bits are sharp, wrenches are correctly sized, and safety gear is in good condition. Proper preparation streamlines the process, ensuring a secure and long-lasting awning installation.
What Are the Key Preparation Steps for Installing an Open Patio Awning?
Ensuring a Smooth and Secure Installation
Proper preparation is essential for a successful open patio awning installation. Taking the time to inspect the site, gather necessary tools, and implement safety measures ensures a seamless process and long-lasting results.
1. Conduct a Thorough Site Inspection
Before installation, assess the mounting surface to confirm its structural integrity. Whether attaching the awning to a wall, ceiling, or beam, ensure the surface can support its weight. Key steps include:
- Measuring the installation area to determine the correct awning size.
- Checking for obstructions such as electrical wiring, drainage pipes, or uneven surfaces.
- Using a level to mark precise mounting points for proper alignment.
2. Prepare the Installation Area
A clutter-free workspace enhances efficiency and safety. Before beginning installation:
- Remove furniture, plants, or other obstacles that may interfere with movement.
- Ensure the area is dry and free from dust or debris that could affect mounting stability.
- If installing on a wall, confirm that the surface is clean and suitable for securing brackets.
3. Verify Tools and Materials
Having the right tools on hand streamlines the installation process. Essential items include:
- Drill and masonry bits for securing brackets.
- Adjustable wrench and socket set for tightening bolts.
- Stud finder to locate secure mounting points.
- Ladders and safety gear to ensure stability during installation.
4. Prioritise Safety Measures
Safety is paramount when handling tools and heavy components. To minimise risks:
- Wear protective gloves, safety goggles, and non-slip footwear.
- Ensure ladders are stable and positioned on even ground.
- For motorised awnings, turn off power sources before handling electrical connections.
Why Preparation Matters
Skipping these steps can lead to misalignment, weak mounting, or structural issues. A well-prepared installation site ensures a secure, durable setup, allowing you to enjoy the benefits of your open patio awning with confidence.
How Can I Avoid Common Mistakes When Installing an Open Patio Awning?
Ensuring a Smooth and Secure Installation
Installing an open patio awning requires precision, and even minor errors can lead to misalignment, instability, or reduced durability. By understanding and avoiding common mistakes, you can ensure a flawless installation that enhances both functionality and longevity.
1. Inaccurate Measurements and Misalignment
One of the most frequent errors is improper measurements, which can result in an awning that doesn’t fit correctly or fails to extend smoothly. To prevent this:
– Carefully measure the installation area, considering both width and projection.
– Use a level to ensure the awning is mounted evenly, preventing operational issues.
– Double-check bracket placement before securing them to avoid unnecessary adjustments.
2. Weak or Improper Mounting
Awnings must be securely anchored to withstand wind and weather conditions. Common mounting mistakes include:
– Choosing the wrong fasteners for the surface material, leading to weak support.
– Failing to attach brackets to structural beams, which can cause instability.
– Over-tightening bolts, which may damage the mounting points or weaken the structure.
3. Overlooking Safety Precautions
Skipping safety measures can lead to accidents or damage. Key precautions include:
– Wearing protective gloves and safety goggles when handling tools.
– Ensuring ladders are stable and positioned on even ground.
– Checking for hidden electrical wiring before drilling into walls.
4. Rushing the Installation Process
A hurried installation often results in errors that compromise the awning’s performance. To avoid this:
– Allocate sufficient time to follow each step carefully.
– Ensure all tools and materials are prepared before starting.
– Adjust the awning’s pitch and tension settings for optimal functionality.
5. Learning from Others’ Mistakes
By recognising these common pitfalls, you can take a more methodical approach to installation. A well-planned and correctly executed setup ensures your awning provides reliable shade, protection, and aesthetic appeal for years to come.
Best Practices for Maintaining Your Awning
A well-maintained awning not only enhances the aesthetic appeal of your outdoor space but also ensures long-term durability and optimal performance. Regular care prevents premature wear, protecting your investment for years to come.
Essential Maintenance Tasks
- Gentle Cleaning: Use a soft brush or low-pressure hose to remove dust and debris. For deeper cleaning, a mild soap solution works well—avoid harsh chemicals that may degrade the fabric.
- Frame Care: Wipe down the frame with a damp cloth to prevent dirt buildup. If your awning has a powder-coated finish, periodic cleaning helps maintain its pristine appearance.
- Lubrication: Moving parts, such as joints and retractable arms, benefit from occasional lubrication to ensure smooth operation.
How Often Should You Maintain Your Awning?
- Monthly: Light cleaning to remove dust and debris.
- Seasonally: Inspect for signs of wear, such as fraying fabric or rust on metal components.
- Annually: A thorough deep clean, including checking motorised parts and tightening loose bolts.
Signs Your Awning Needs Repair or Replacement
- Fabric Issues: Fading, tears, or water pooling indicate the need for replacement.
- Operational Problems: Difficulty retracting or extending the awning may signal mechanical wear.
- Structural Concerns: Bent arms or loose fittings compromise stability and should be addressed promptly.
By incorporating these maintenance practices, you can extend the life of your awning while ensuring it remains a stylish and functional addition to your outdoor space.
What Are the Benefits of Professional Installation?
Precision, Expertise, and Long-Term Reliability
Installing a Weinor awning is an investment in both comfort and style, but ensuring its durability and optimal performance requires expert handling. At The Outdoor Living Group, we specialise in professional awning installation, bringing over 20 years of experience to guarantee a seamless and secure setup tailored to your property.
Why Choose Professional Installation?
Flawless Fit and Secure Mounting
Our team ensures that your awning is installed with precise alignment, proper load distribution, and secure anchoring, preventing structural issues and enhancing longevity.
Tailored Solutions for Your Space
Every property is unique, and we provide bespoke installation services, considering factors such as wall strength, wind exposure, and architectural aesthetics to achieve the perfect fit.
Advanced Technology Integration
From motorised operation to smart home connectivity, our experts handle the technical aspects, ensuring smooth functionality and effortless control of your awning.
Weather-Resistant and Durable Setup
A poorly installed awning can be vulnerable to wind damage and misalignment. Our certified installation process ensures your awning withstands the elements while maintaining its sleek appearance.
Comprehensive Aftercare and Support
Beyond installation, we offer post-installation support, including maintenance guidance and warranty services, so you can enjoy complete peace of mind.
Trust The Outdoor Living Group for Expert Installation
With our commitment to quality, precision, and customer satisfaction, we ensure that your Weinor awning is installed to the highest standards. Contact us today to schedule a consultation and transform your outdoor space with confidence.